Accessing HCU’s Student Systems
Welcome, Husky!
This page will help you gain access to your HCU One Login and become familiar with Houston Christian University systems. New students should follow the below steps in order.
![]()
Setting Up Your HCU One Login
Step 1: Locate Your Username
Your username may be found:
- in the financial aid award letter that is sent by U.S. postal mail
- on the applicant status portal in a box labeled “Your HCU OneLogin Information” (if you have submitted your deposit)
- by contacting your admission counselor
- by telephoning the Help Desk at 281-649-3410
Your username will have your last name and first initial (e.g., smithj) and may also have numbers in it. It will also become the first part of your university email address (i.e. smithj@HC.edu).

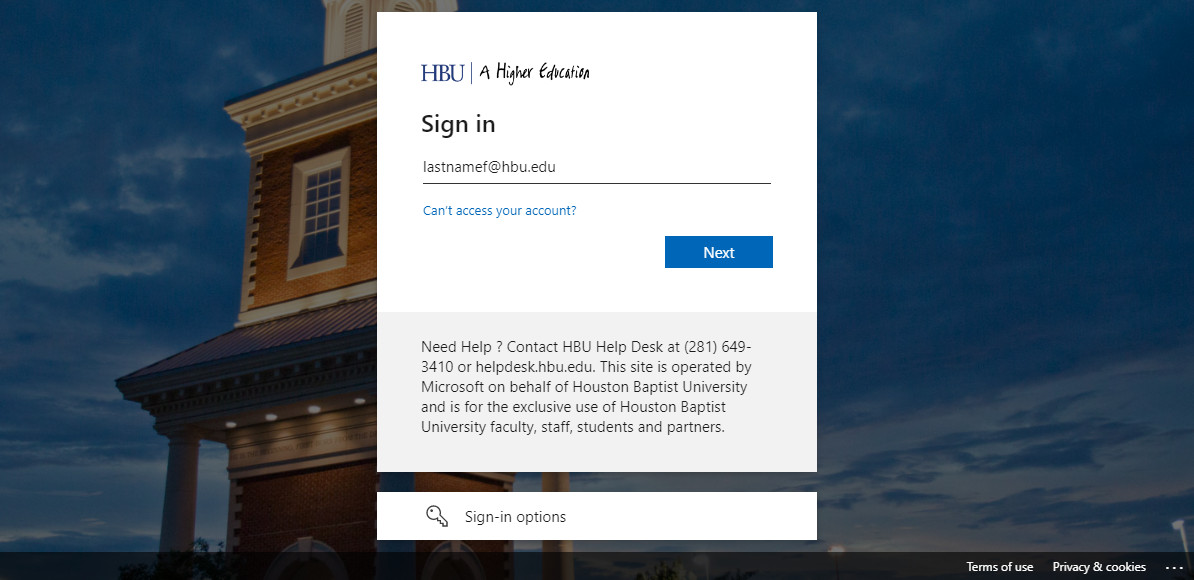
Step 2: Log In to HuskyNet
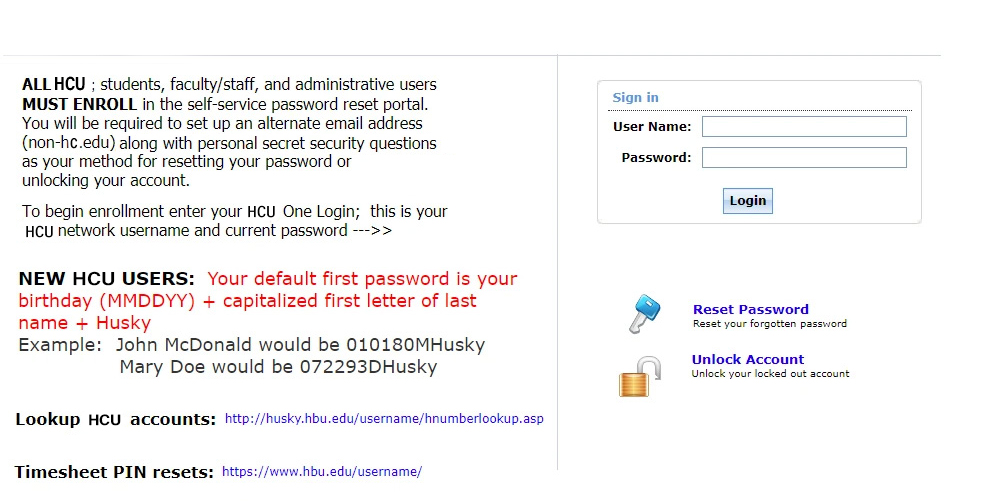
Now that you know your HCU One Login username you will need that information to log in to HuskyNet. Enter your HCU One Login username and add “@HC.edu” to the end of it. If this is your first time logging in, enter your default password. Your default password is your birthday (MMDDYY) + capitalized letter of last name + (Husky). For example: Mary Doe’s birthdate is 07/25/16, so her default password would be “072516DHusky.”
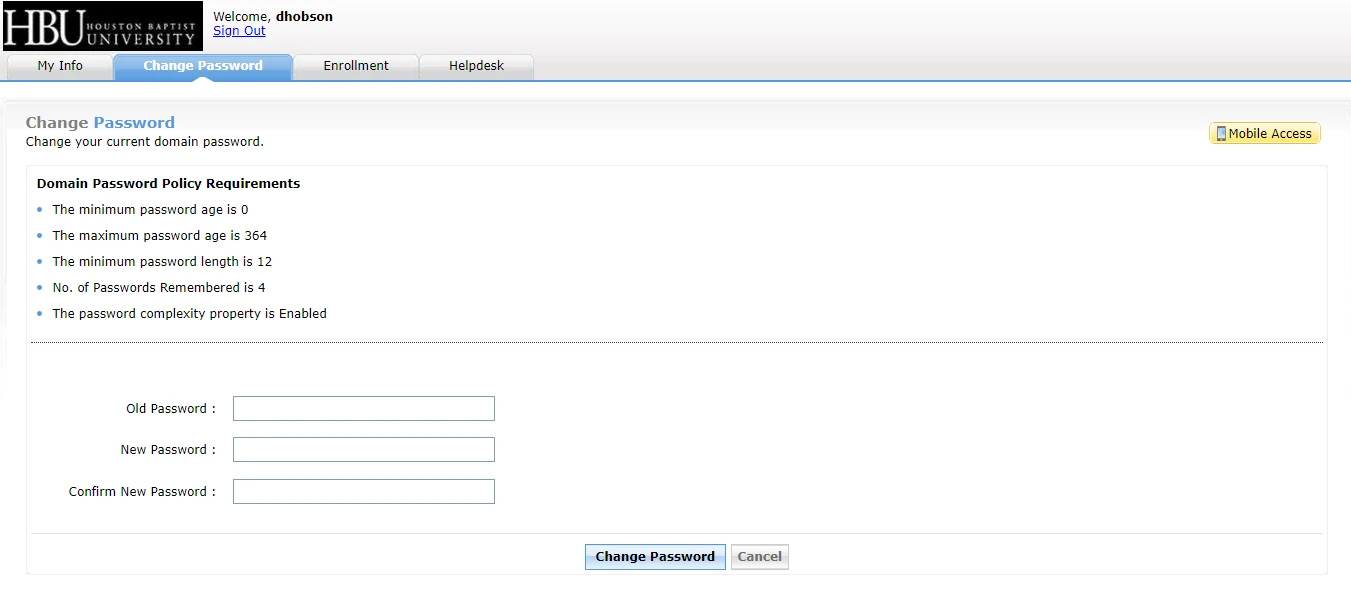
Your new password must meet the following requirements:
- Uppercase character
- Lowercase character
- Numbers or special characters (~!@#$%^&*_+-=)
- Twelve (12) characters long
- No spaces allowed
Once your password has been accepted and reset, you will be prompted to sign in again with your newly created password.
What’s Available in Husky Net?
HuskyNet is where you will go to register for classes, accept your financial aid award(s), and where you can find the TouchNet portal for submitting payments and setting up payment plans. HuskyNet is the only site you will have access to before you register for classes.
![]()
How to Register for Classes
Step 1
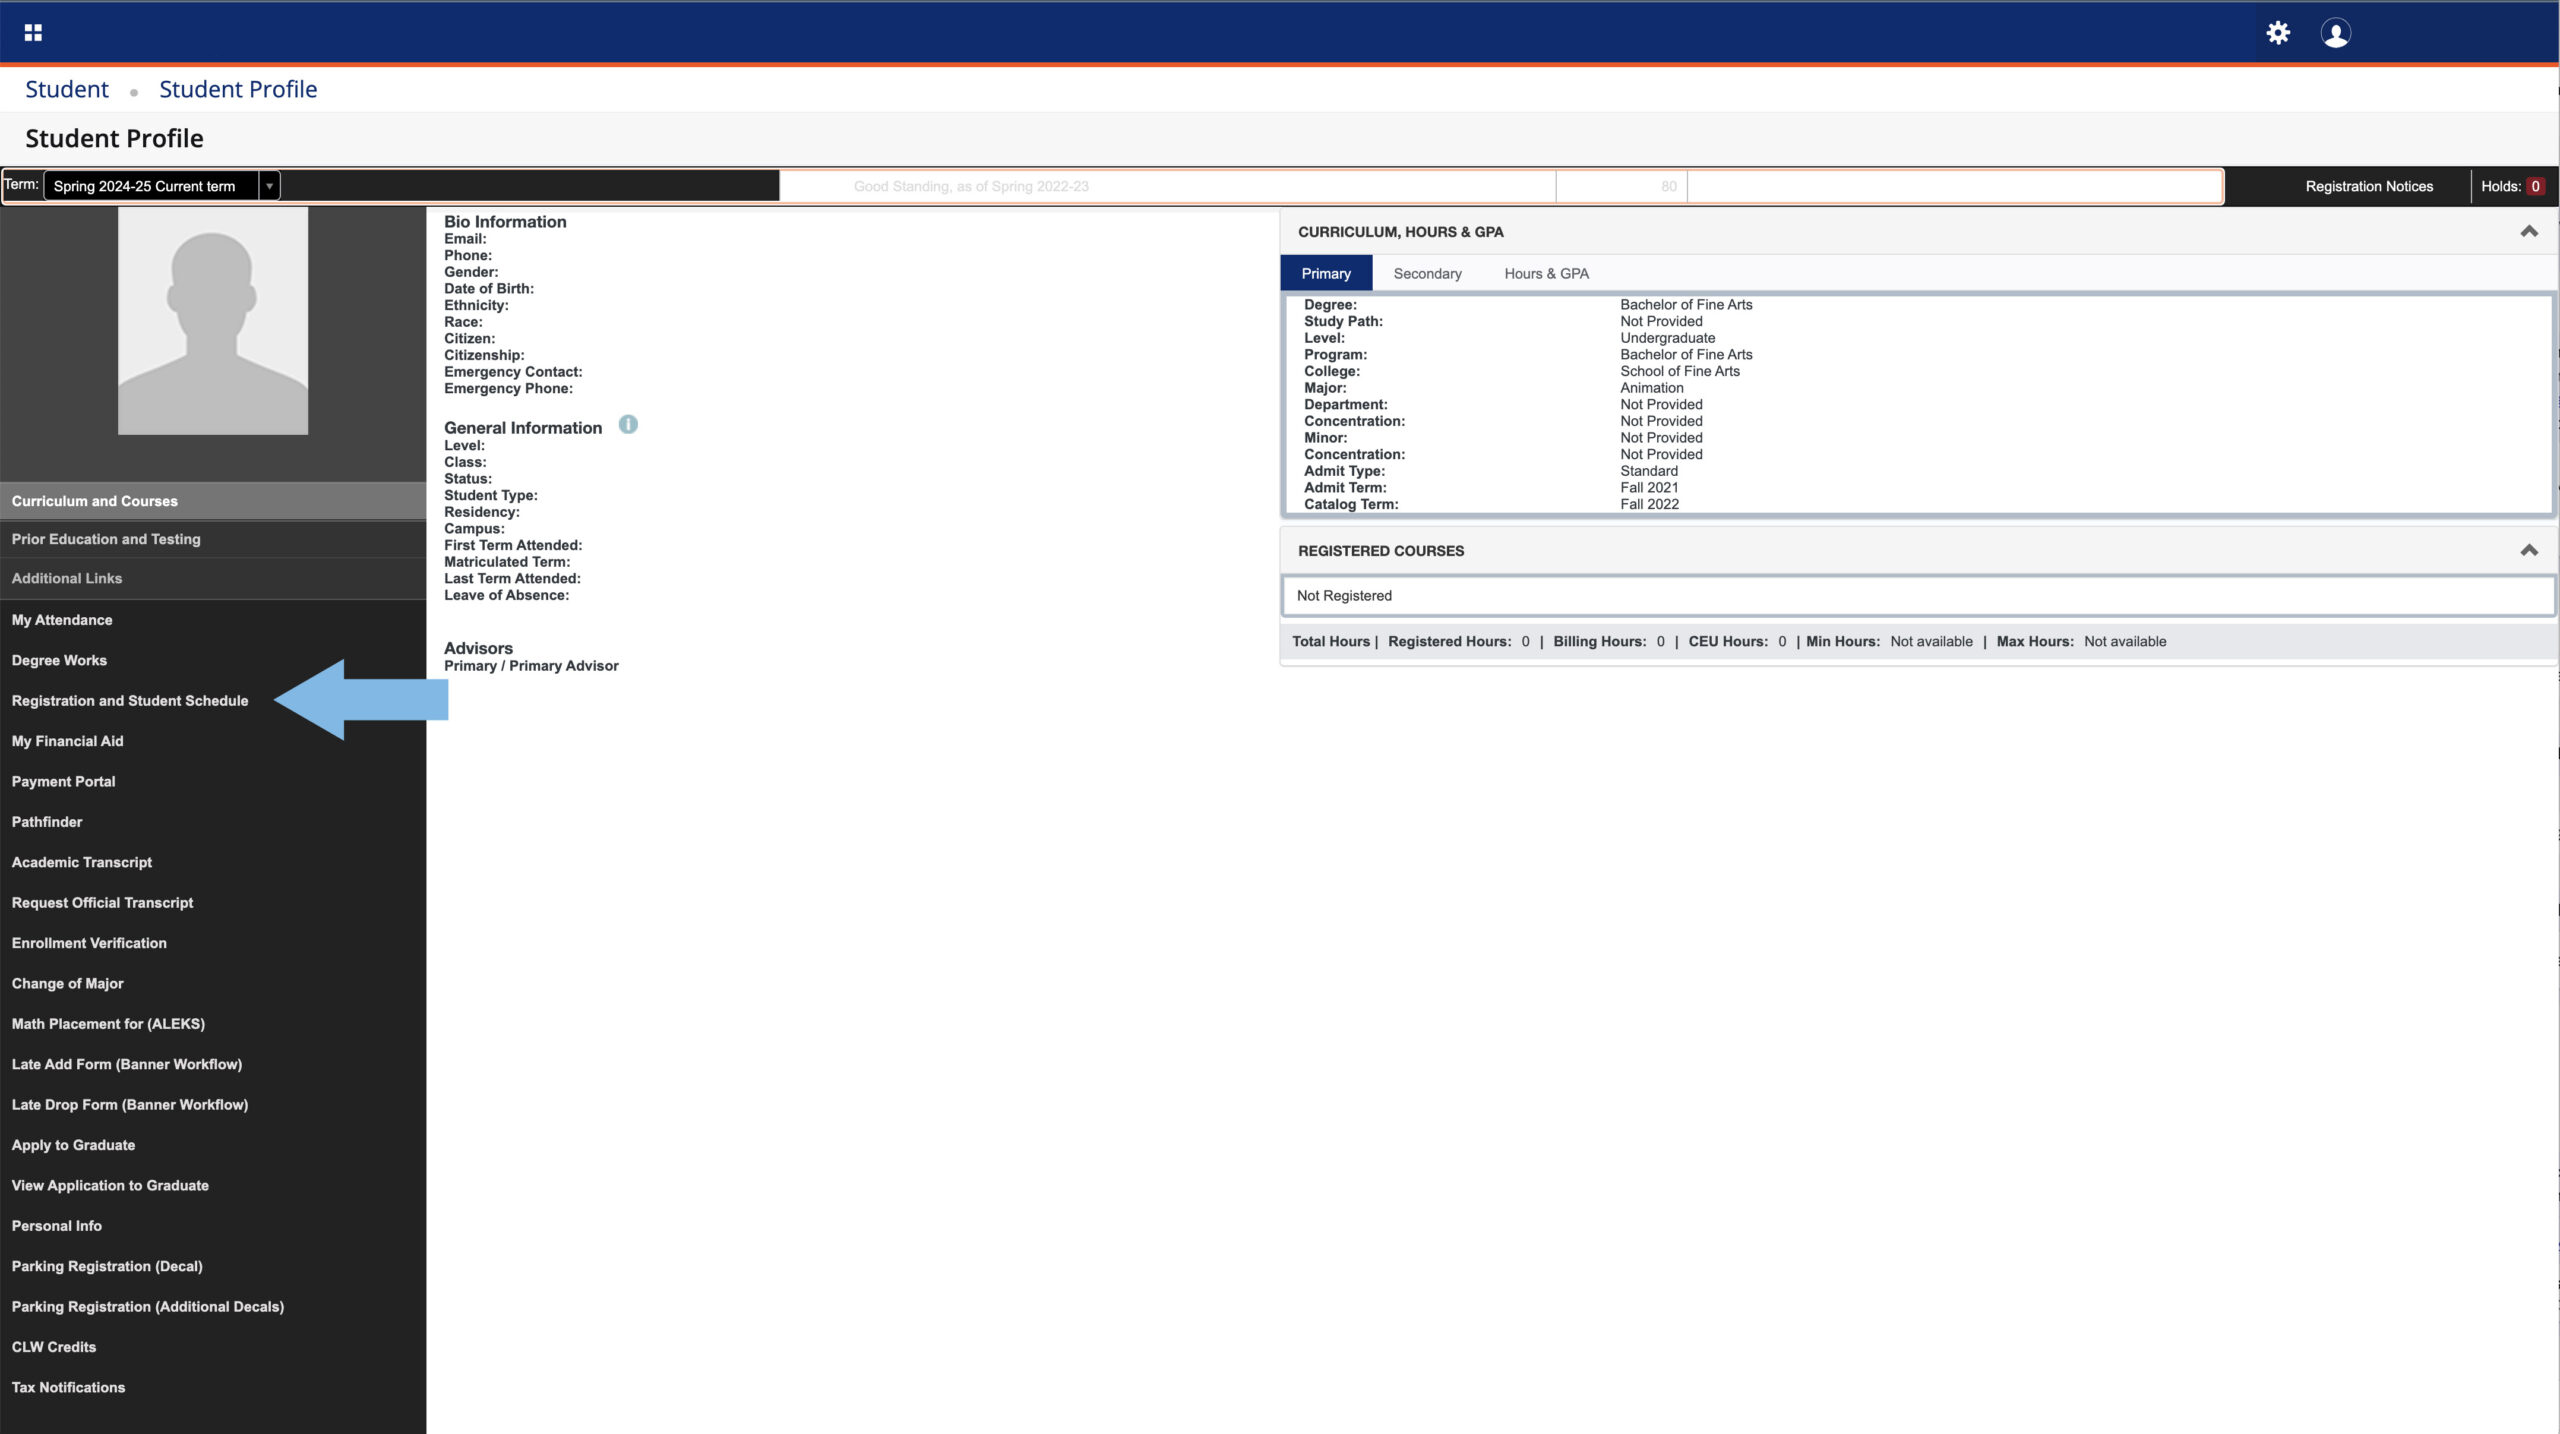
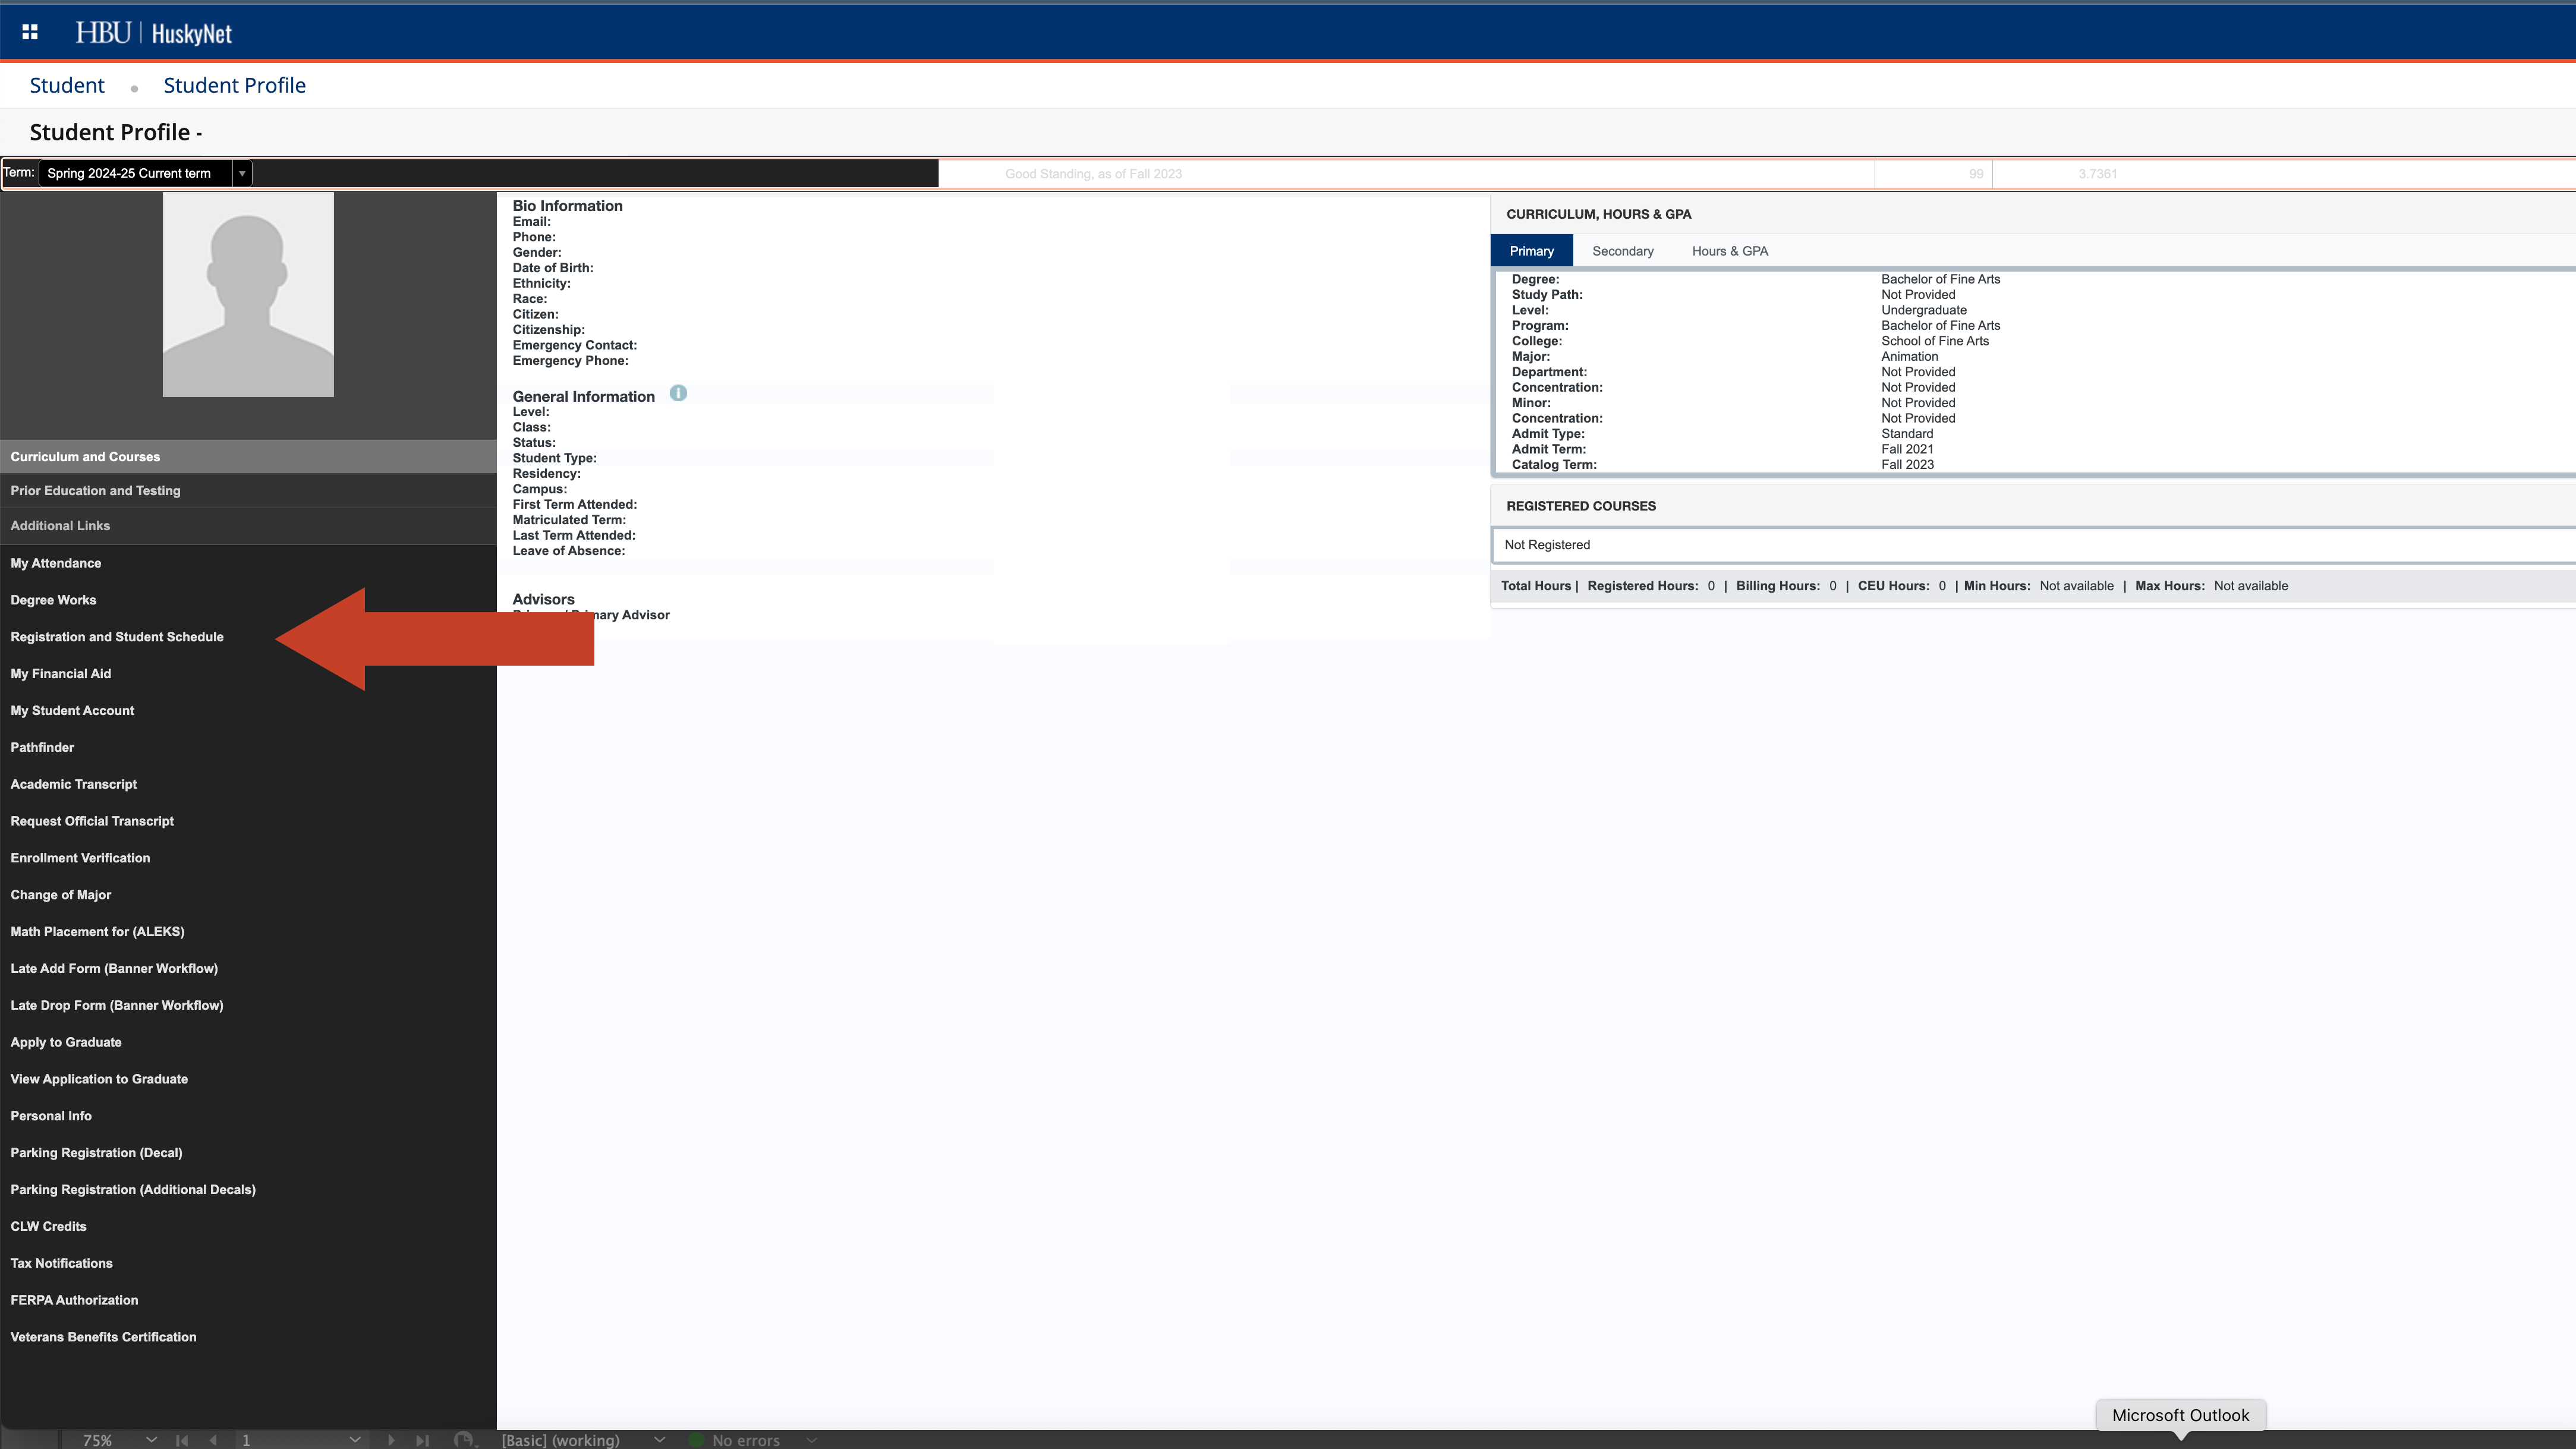
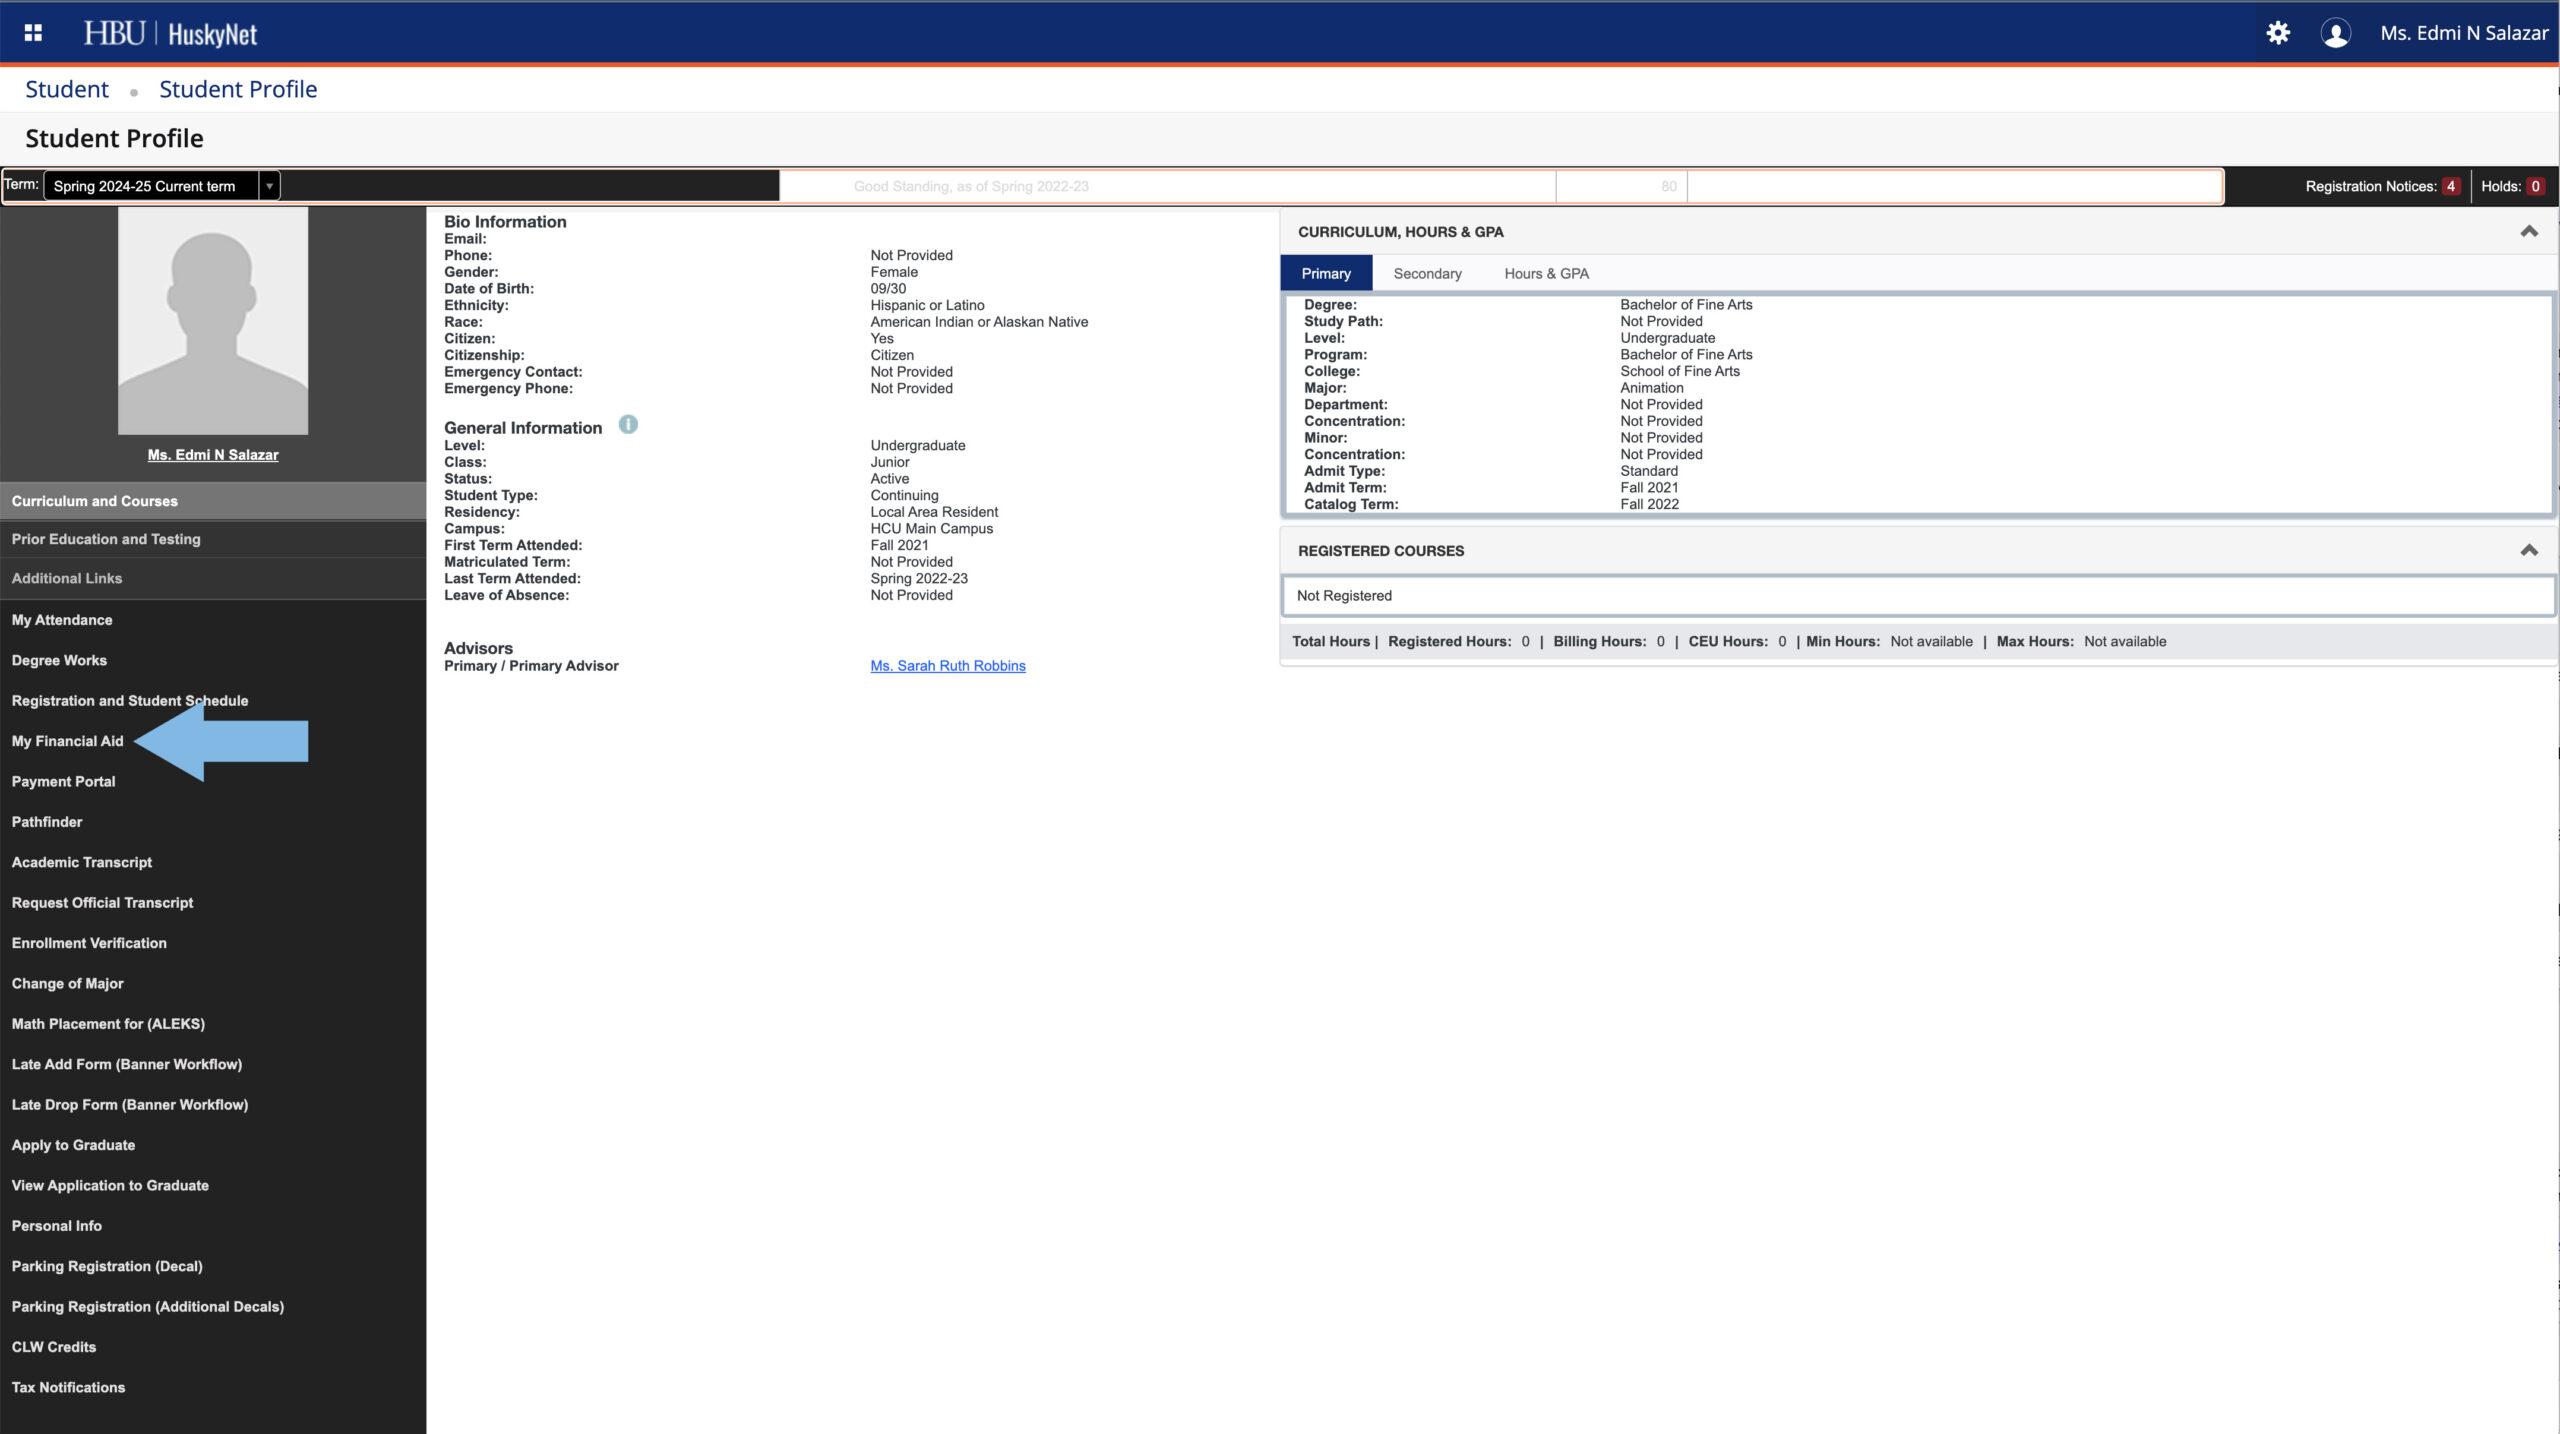
Log in to HuskyNet. On the HuskyNet homepage, you will see a navigation bar toward the left of the screen. Select “Registration and Student Schedule” to begin your class registration.
Step 2
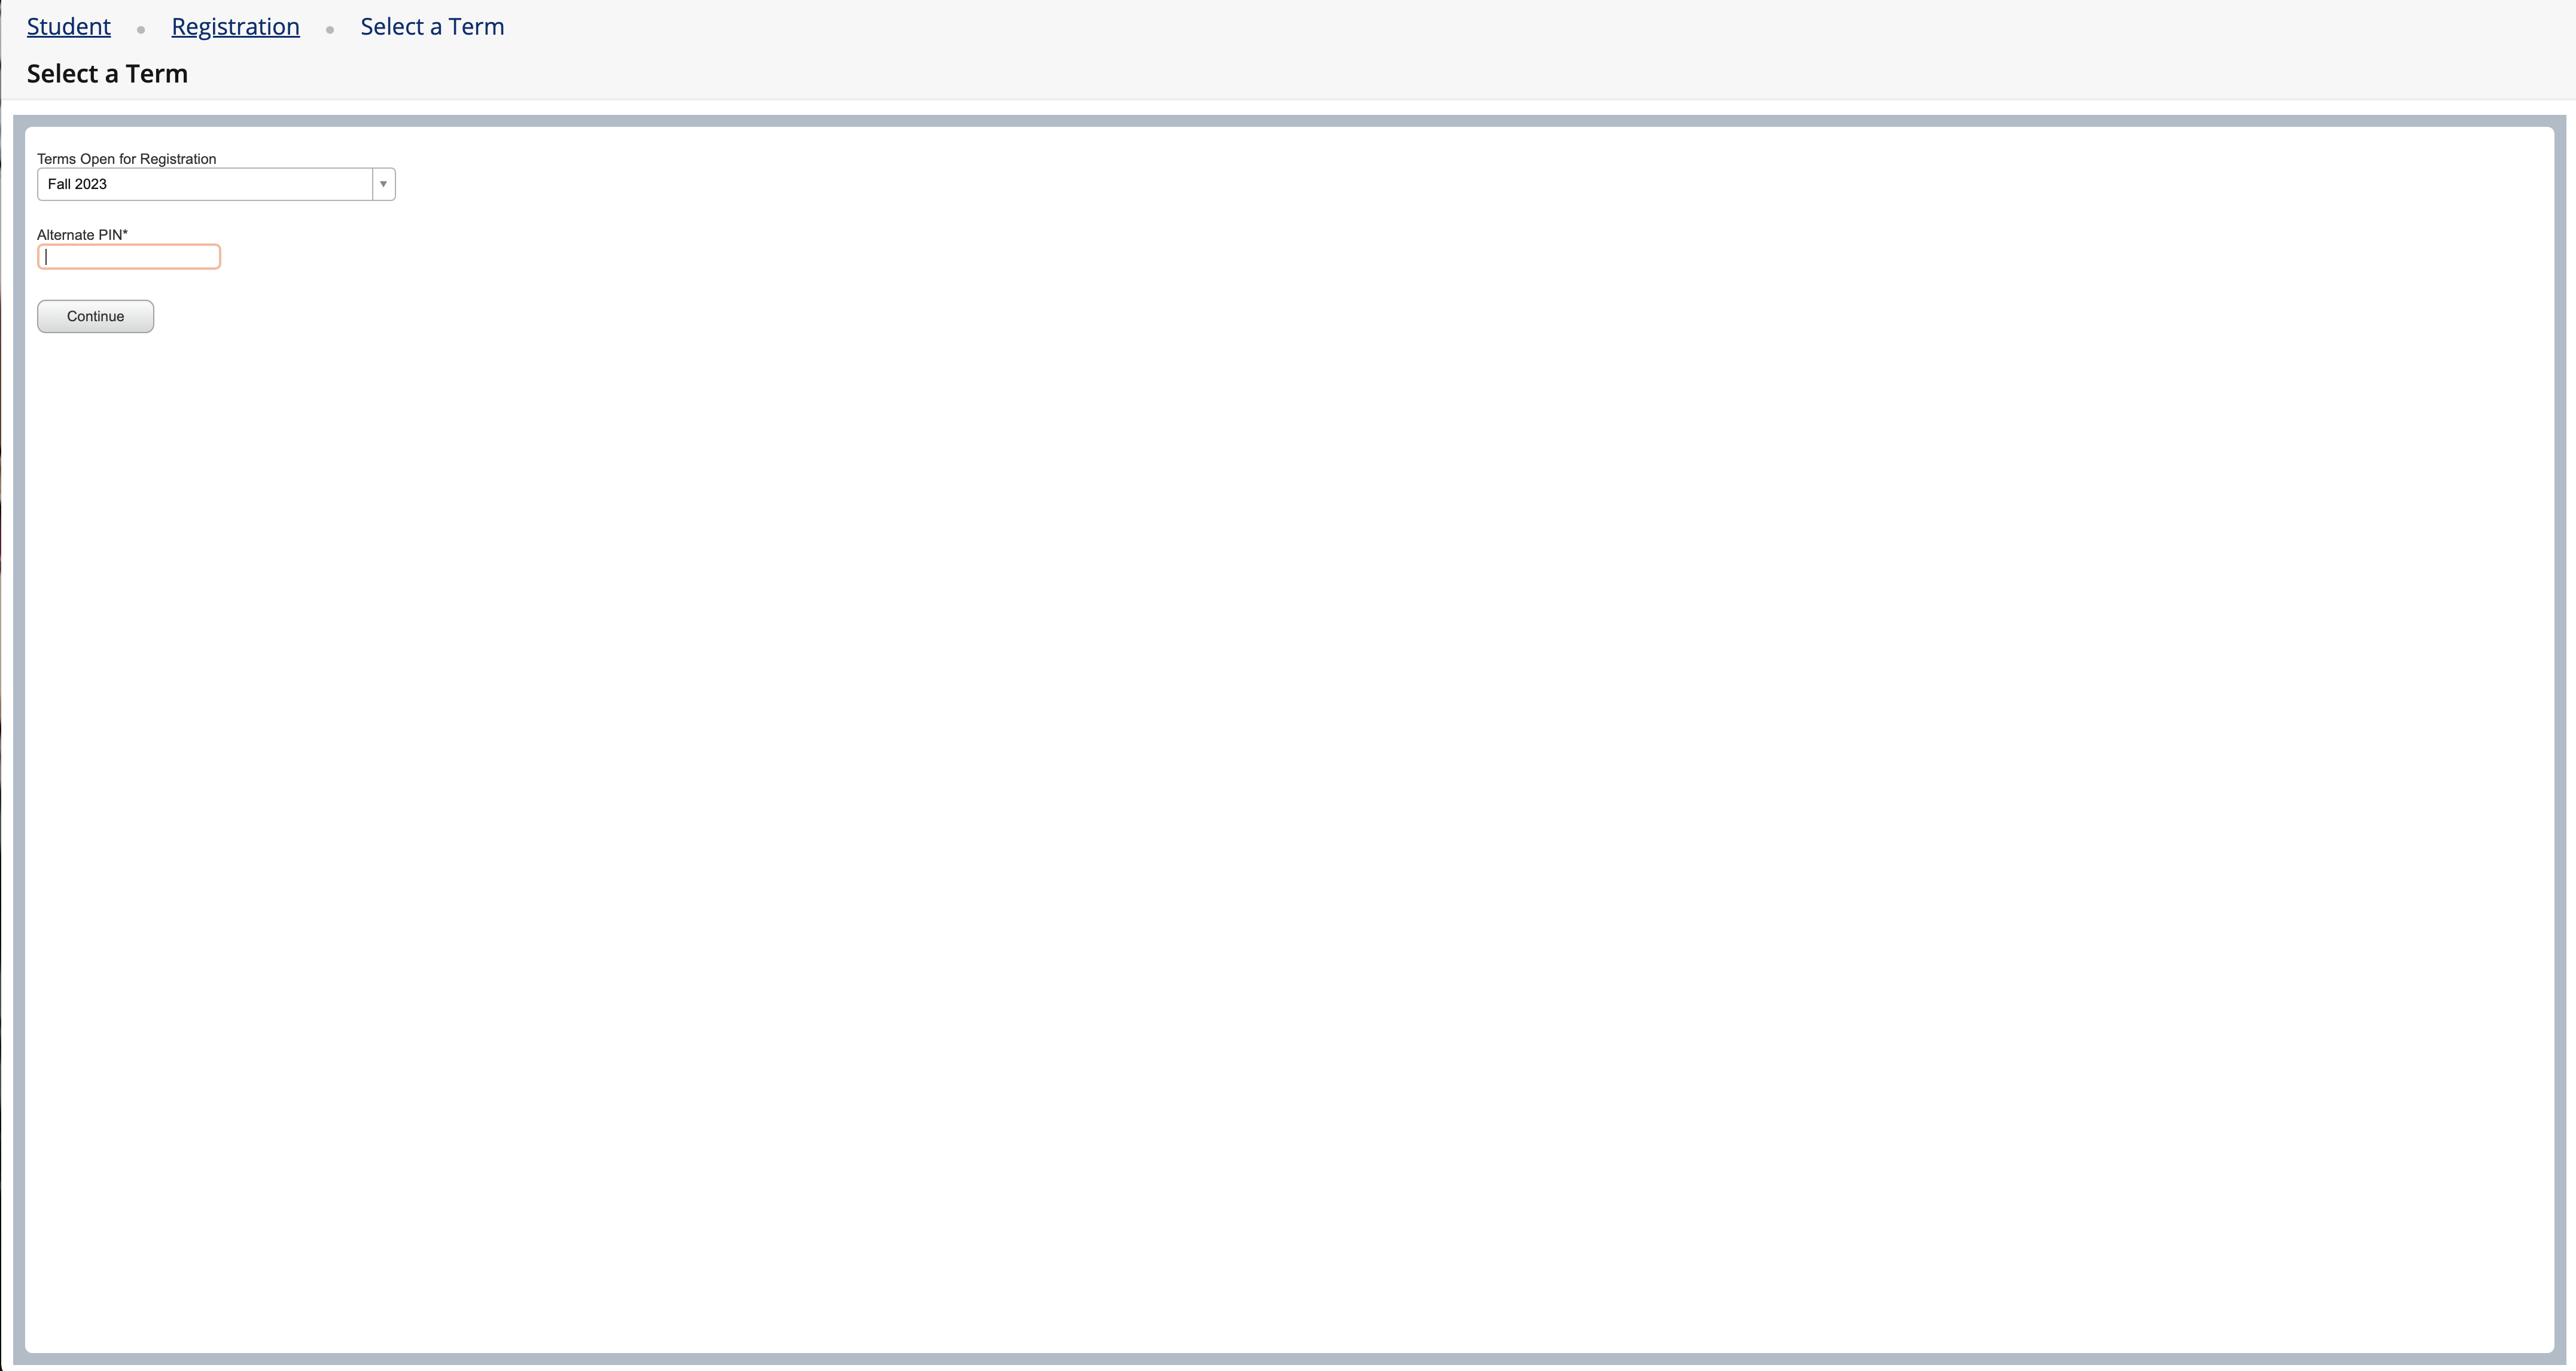
You will be prompted to enter an Alternate PIN. This six-digit PIN number will be given to you by your academic advisor each semester. Note: If you are a freshman, you may receive your Alt Pin at Pre-Registration or Orientation. After your first semester, you will meet with an Academic Advisor to plan out your classes for your degree going forward.

Step 3
Once you enter your Alternate PIN, you will be instructed to enter the CRN(s) (Course Reference Number) for the courses that you want to register for. Note: If you are an incoming freshman, your admissions counselor may provide these CRNs to you.
Helpful Tips for Class Registration
Adding a Class to Your Schedule
To add a class section to your schedule, select “Add to Worksheet”. This will direct you back to the main registration page and automatically insert that CRN into your worksheet. You can then “Submit Changes” or search for another class. Note: most science courses include a separate lab course. You will need to add both the main class and the lab class CRNs to your schedule and submit these changes at the same time.
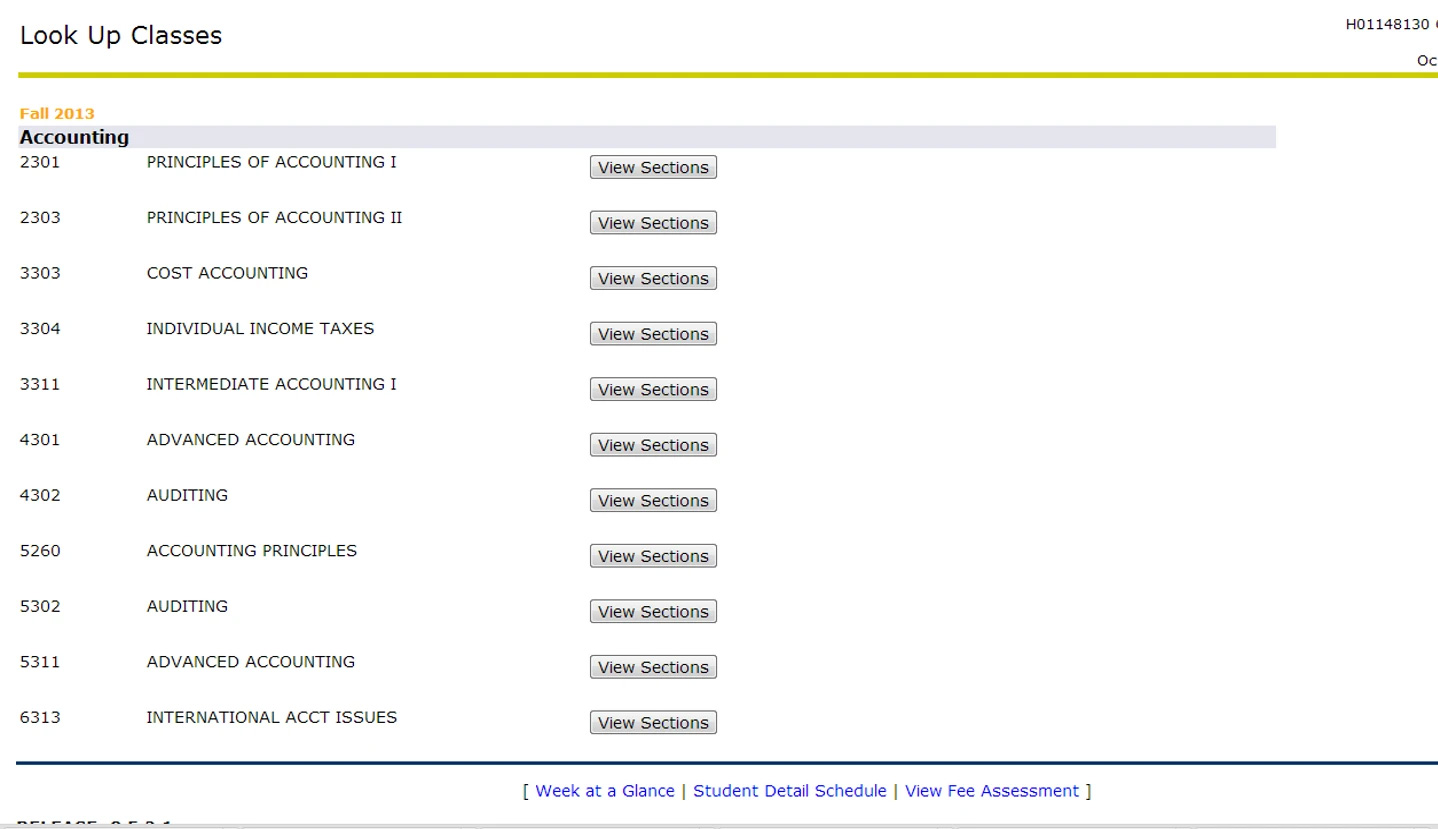
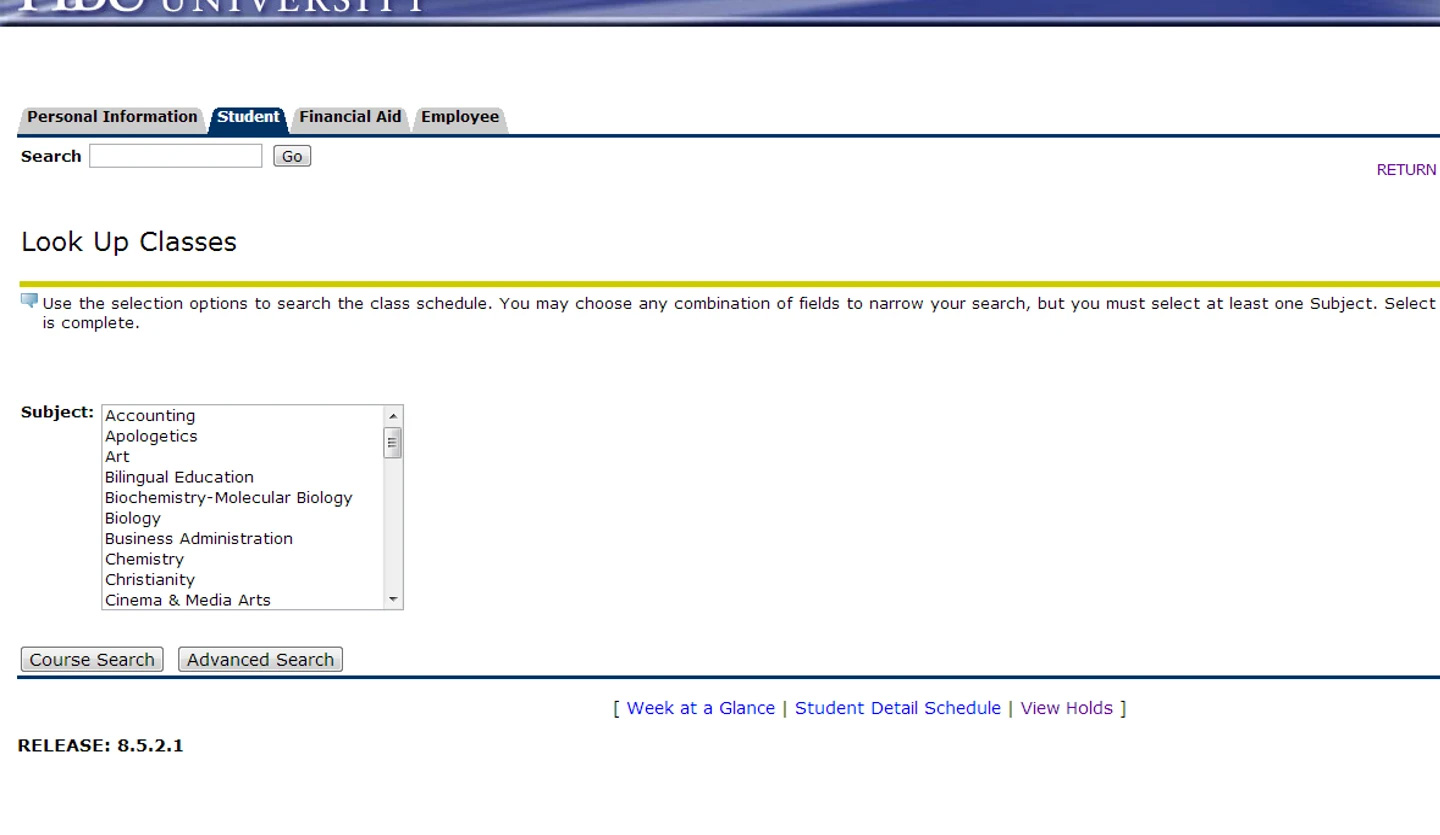
Locating a CRN for a Course
If you are not provided with a CRN for a course you need to register for, you can search which classes are available by term. Select “Course Search” at the bottom of the page. You can then search by class subject and view available sections of the class you are searching for. If there is a “C” next to the course, that means that the course is closed and unavailable.
How to View Your Class Schedule
Step 1
Log in to HuskyNet. On the HuskyNet homepage, you will see a navigation bar toward the top of the screen with tabs. Change term to current term and your schedule be on the right side of the screen.
Tip: Room locations sometimes change during the first week of class. Be sure to check your schedule on the day of your classes to ensure the room assignment has not been adjusted.
Submitting Your FERPA Information
FERPA stands for the Family Educational Rights and Privacy Act. Under this act, students maintain privacy of their academic records after the age of 18 or once they enroll in a postsecondary institution. Every student must submit a FERPA form to inform the Office of Academic Records who, if anyone, is granted access to these records. You can choose to not allow anyone access, or you can add your parent(s) or guardian(s) to this release.
Step 1
Log in to HuskyNet. On the HuskyNet homepage, you will see a navigation bar toward the top of the screen with tabs for Personal Information, Student, Financial Aid and My CLW Points. Select “Personal Information”.
Step 2
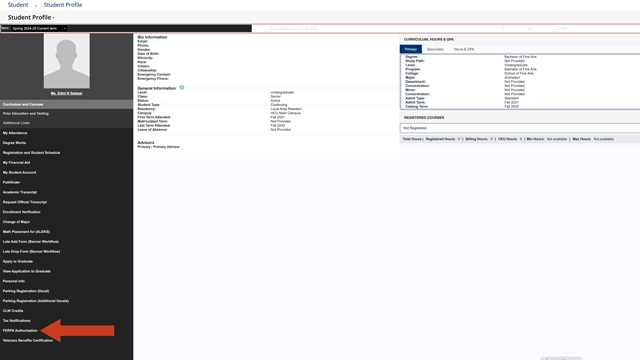
On the Personal Information menu you need to select “FERPA Authorization Form.”
Step 3
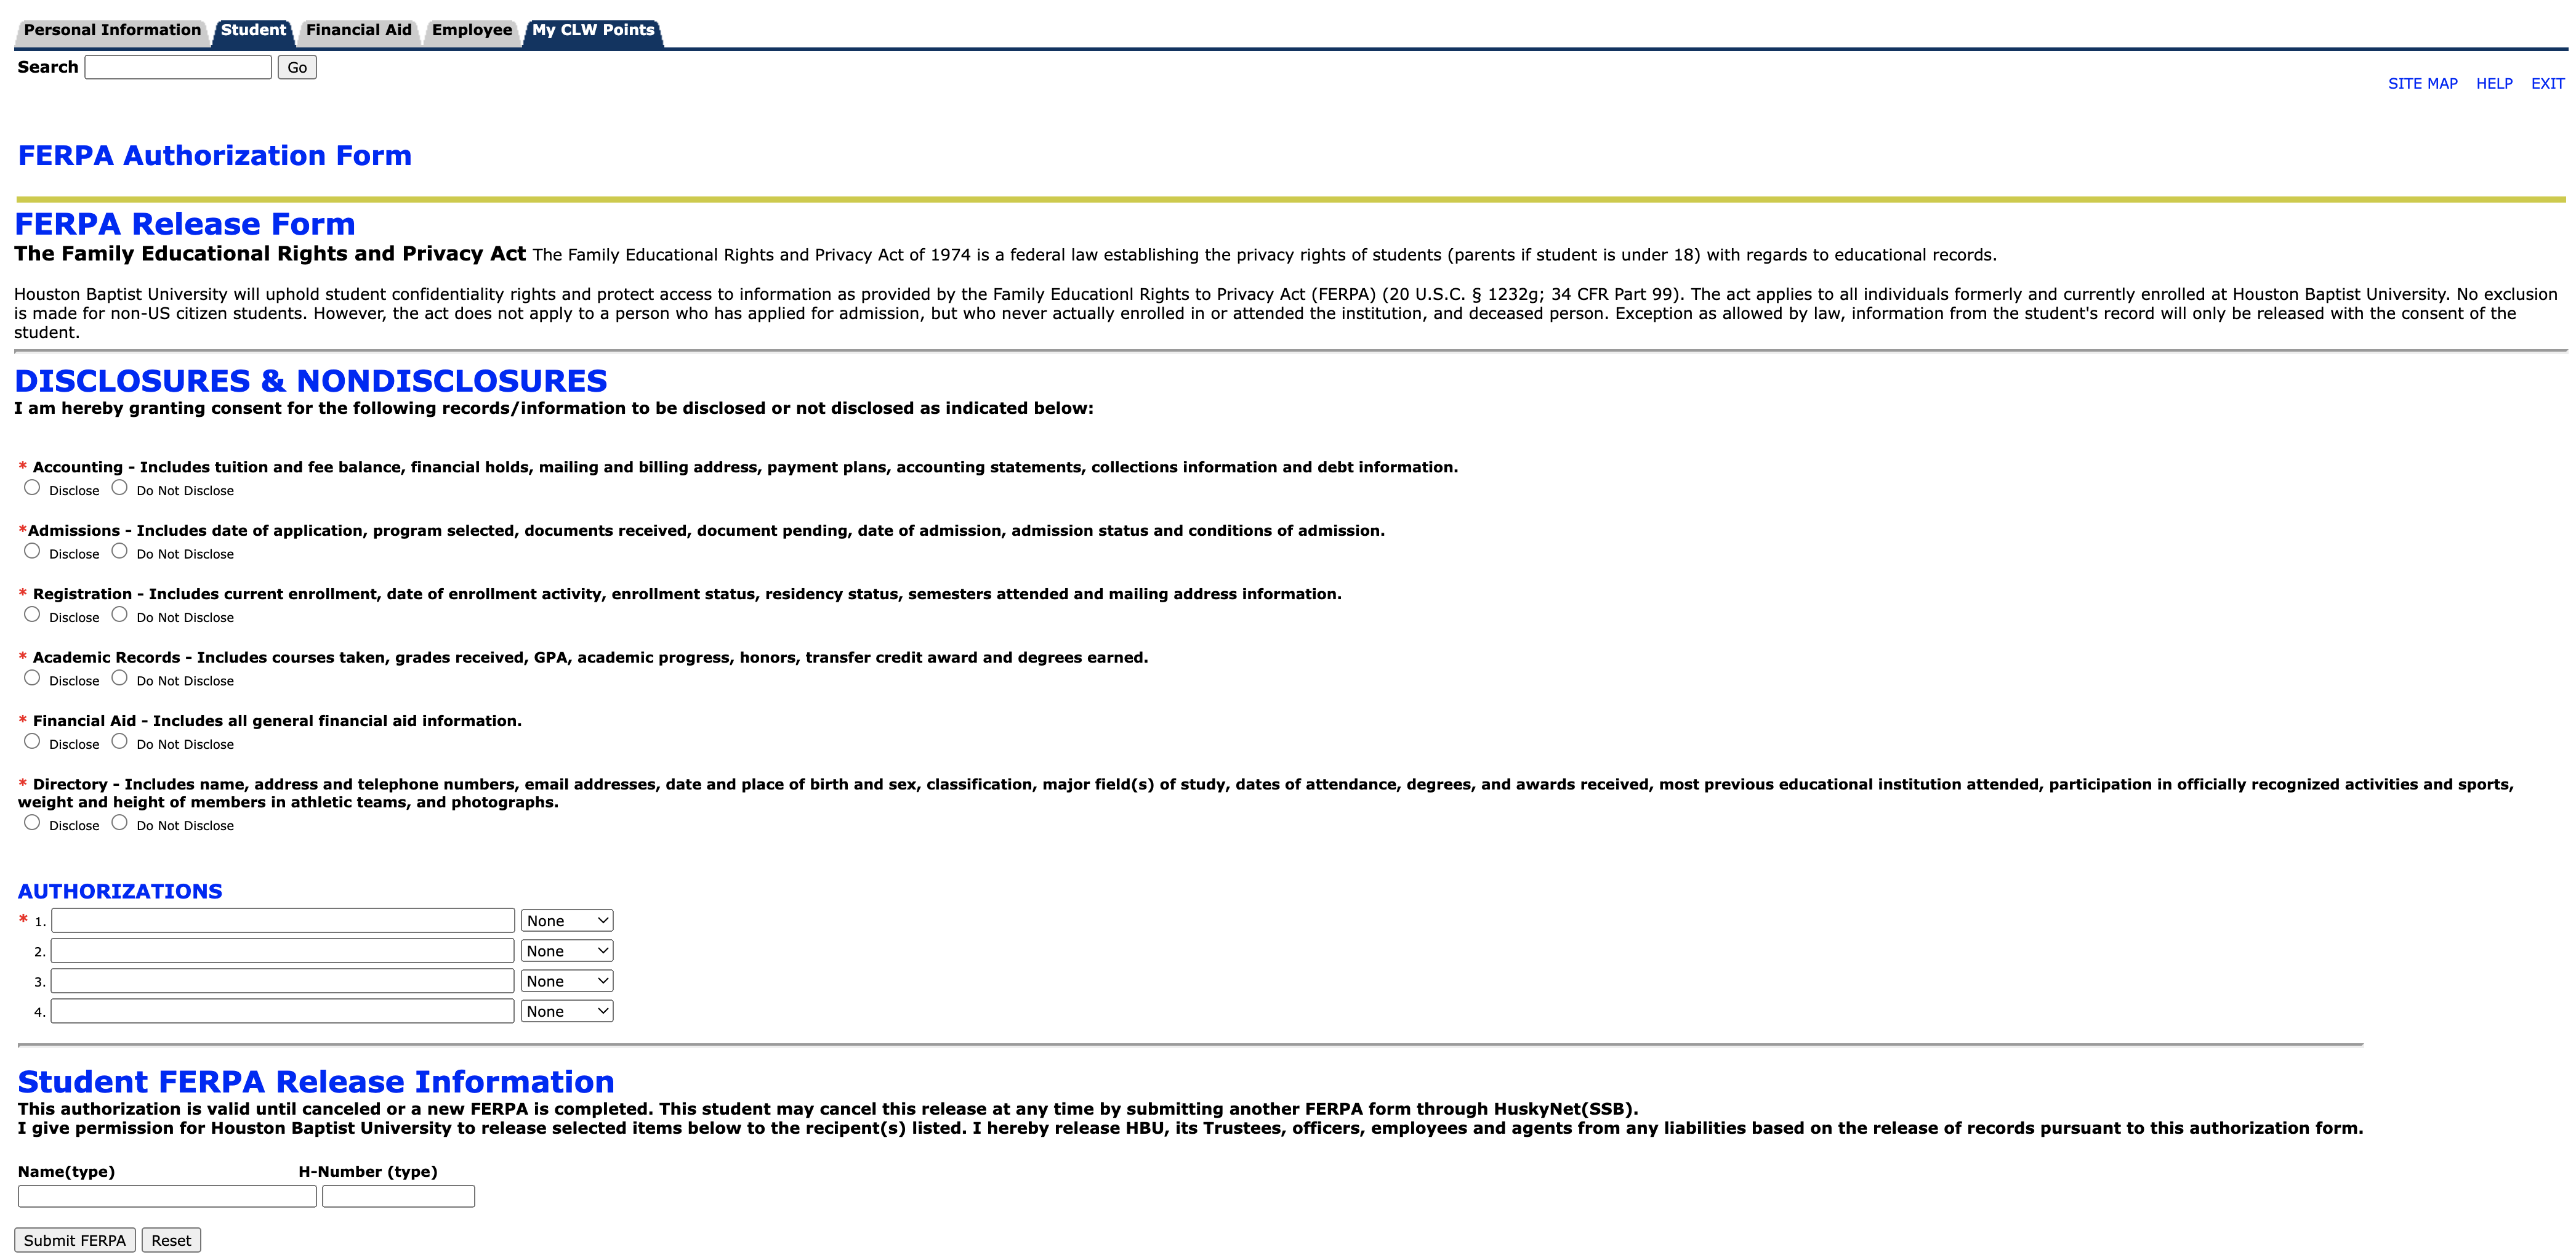
Under “Authorizations,” list the name(s) of the person(s) whom you would like to grant access to your records.
Step 4
When the form is completes, scroll to the bottom of the page and select “Submit FERPA”.
View and Accept Your Financial Aid Award Offer(s)
Step 1
Log in to HuskyNet. On the HuskyNet homepage, you will see a navigation bar toward the top of the screen with tabs change term to current term year and select Financial Aid in the menu.
Step 2
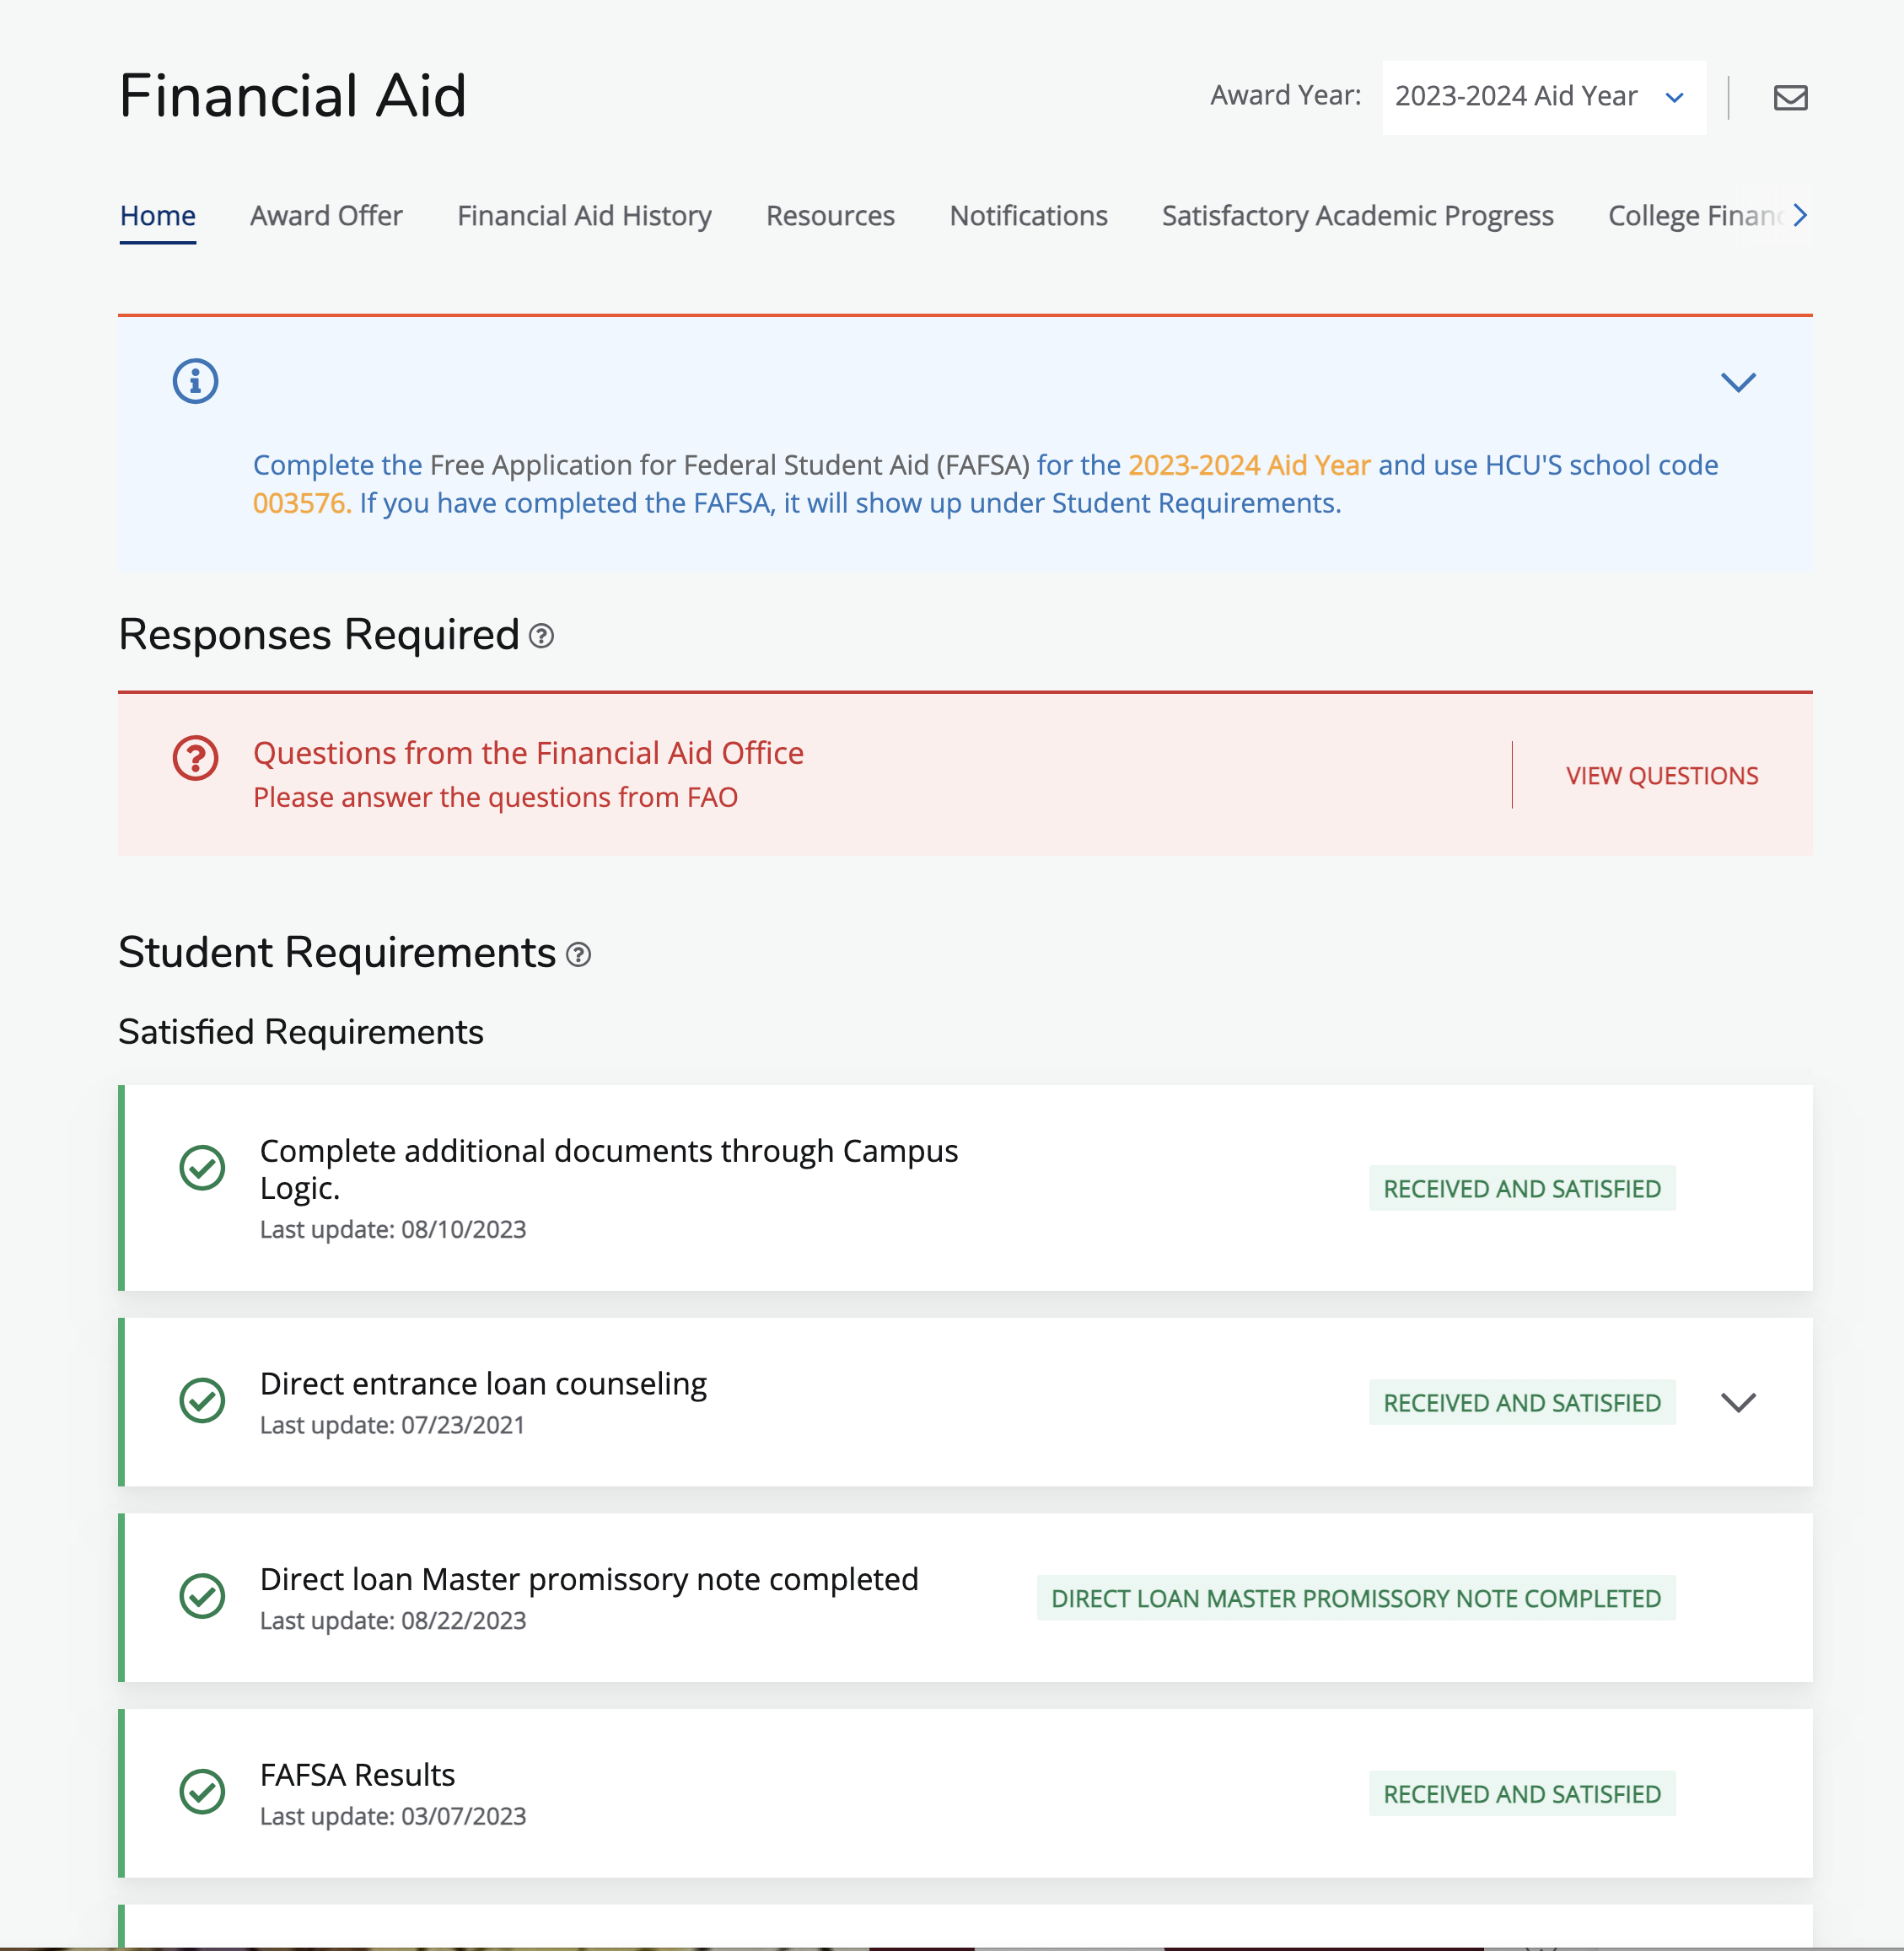
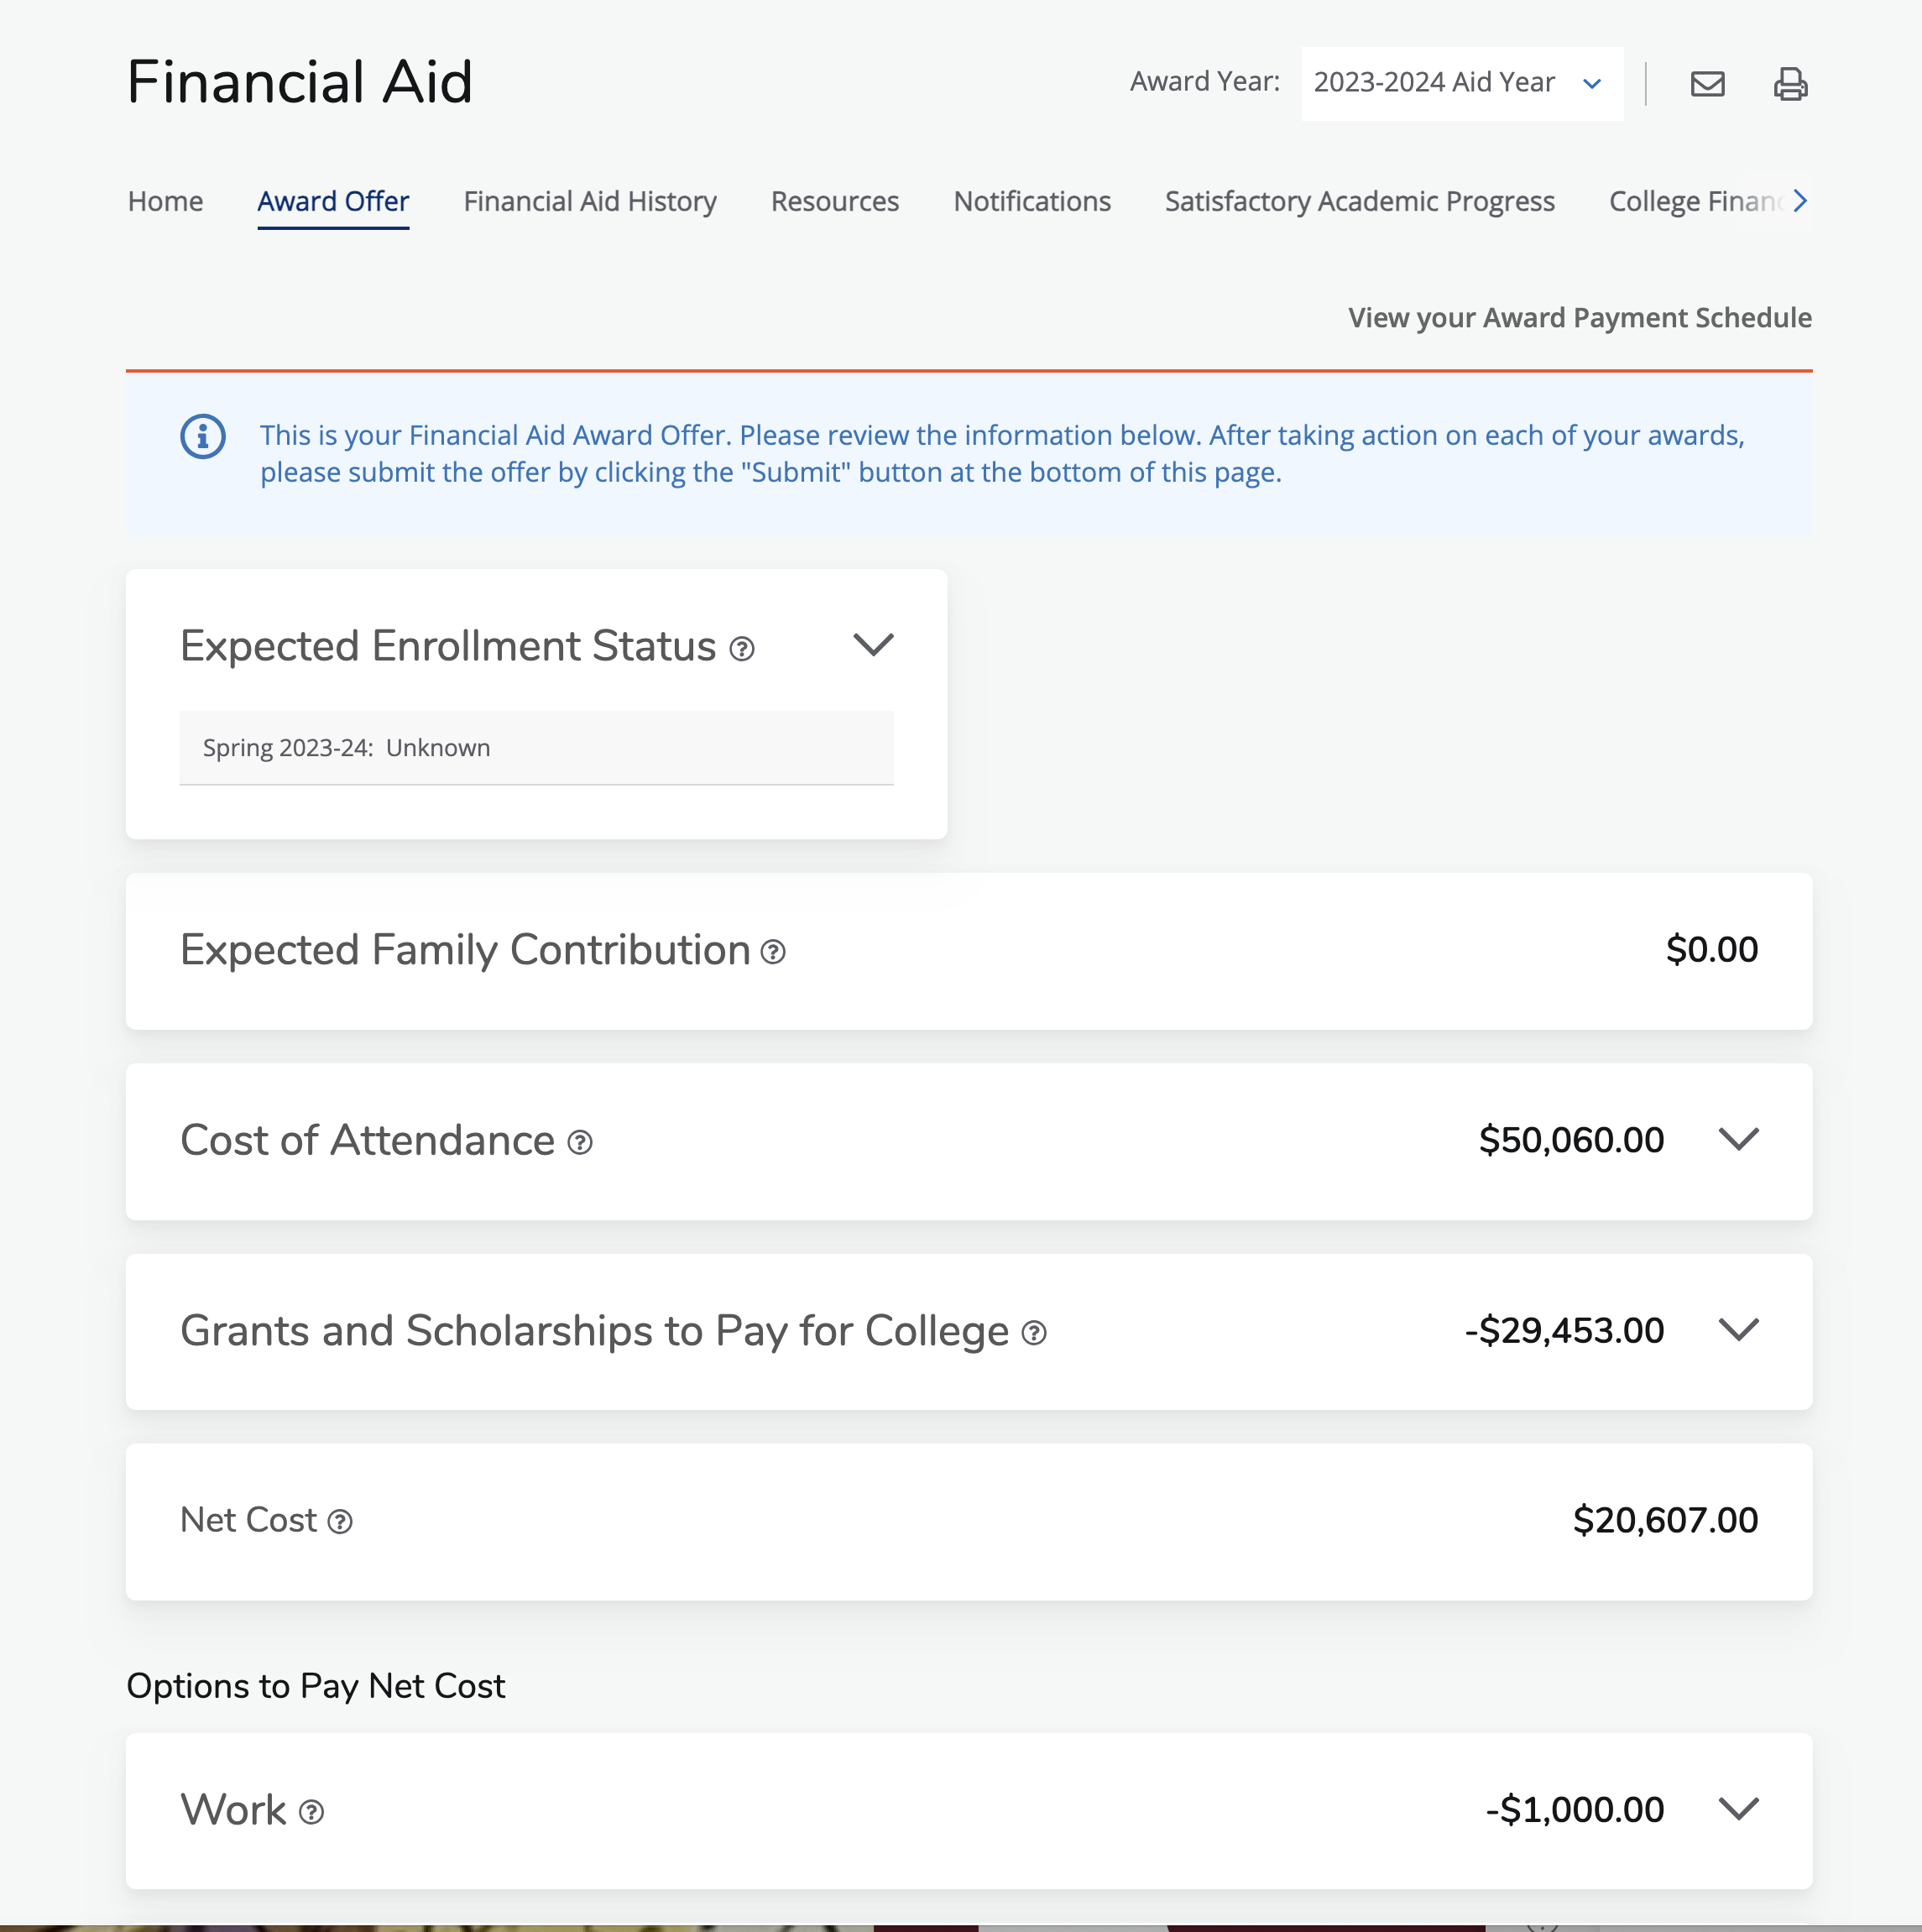
Select “Award,” and then “Award for Aid Year.” This will display your financial aid information for the academic year of your choice. The General Information page will tell you if you need to complete your FAFSA or if it has been submitted to HCU.
Step 3
Navigate throughout the submenu tabs to see which materials you still need to submit. Once all of your documents are complete, you will be able to accept your financial aid award under the “Accept Award Offer” tab.
Tip: For more information about accepting your awards, visit the Financial Aid webpage and review the videos posted at the bottom of the page.
Enroll in LetMeIn
Let Me In allows you to reset your password without IT HelpDesk assistance and update your email display name.
Step 1
Navigate to LetMeIn.HC.edu. To enroll, first sign in with your HCU OneLogin information. If you haven’t yet set up your login password or accessed your username, refer to the top of this page for instructions on how to do so.
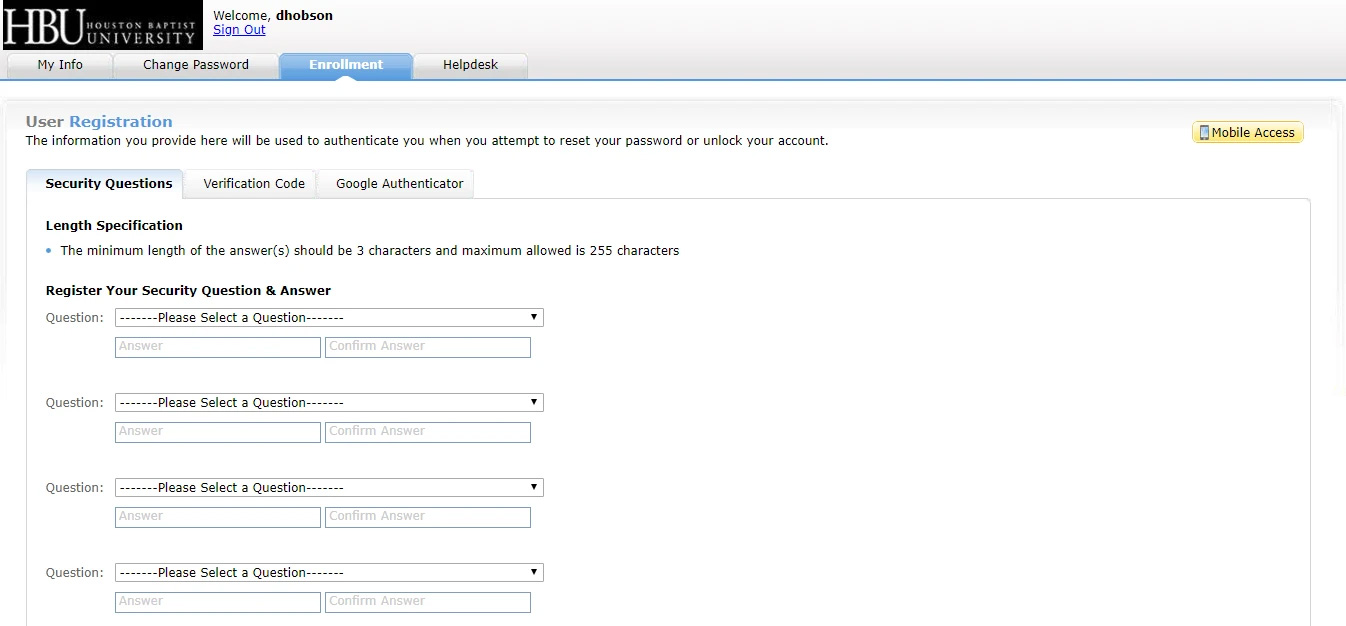
Step 2
To get enrolled in Let Me In, you will need to select the “Enrollment” tab at the top of the screen. Follow the prompts to select your security questions, submit and verify an alternate email address, and/or set up the Google authenticator. We recommend choosing two out of the three security options listed. Once you have completed the form, you will select “Enroll” at the bottom of the page.
![]()
Access the HCU Student Portal
Now that you have registered, you can log into the student portal, your one-stop-shop as an HCU student. The HCU Student Portal houses everything you need for success and gives you single sign-on access to many platforms such as Blackboard, OneDrive, Email, DegreeWorks, and more!
Navigate to my.HC.edu to sign in using your HCU OneLogin. You can also reach the portal through the HCU website: https://my.HC.edu.